| Audience | Platform admins, Marketers |
| Prerequisites |
|
Templates let you reuse common logic across audiences, syncs, and journeys--helping you reduce manual setup—especially for recurring targeting strategies or multi-team workflows.
Learning objectives
After reading this article, you'll know how to:
- Create audience, sync, and journey templates
- Apply templates to new audiences, syncs, or journeys
- Standardize workflows across teams
Types of Templates
Templates are reusable components in Customer Studio. There are three types:
| Template type | What it stores | Where it’s used |
|---|---|---|
| Audience templates | Filter conditions, traits, and event logic | Audience builder |
| Sync templates | Destination, identifiers, sync frequency, and behavior | Sync setup |
| Journey templates | Workflow steps and logic | Journey builders |
Use cases
| Use case | Example |
|---|---|
| Standardized targeting | Create an audience template for “High-value cart abandoners” used across channels |
| Faster setup | Prefill sync fields for destinations with consistent matching settings |
| Cross-team coordination | Let marketers safely reuse logic built by analysts or engineers |
Audience templates
Create an audience template
-
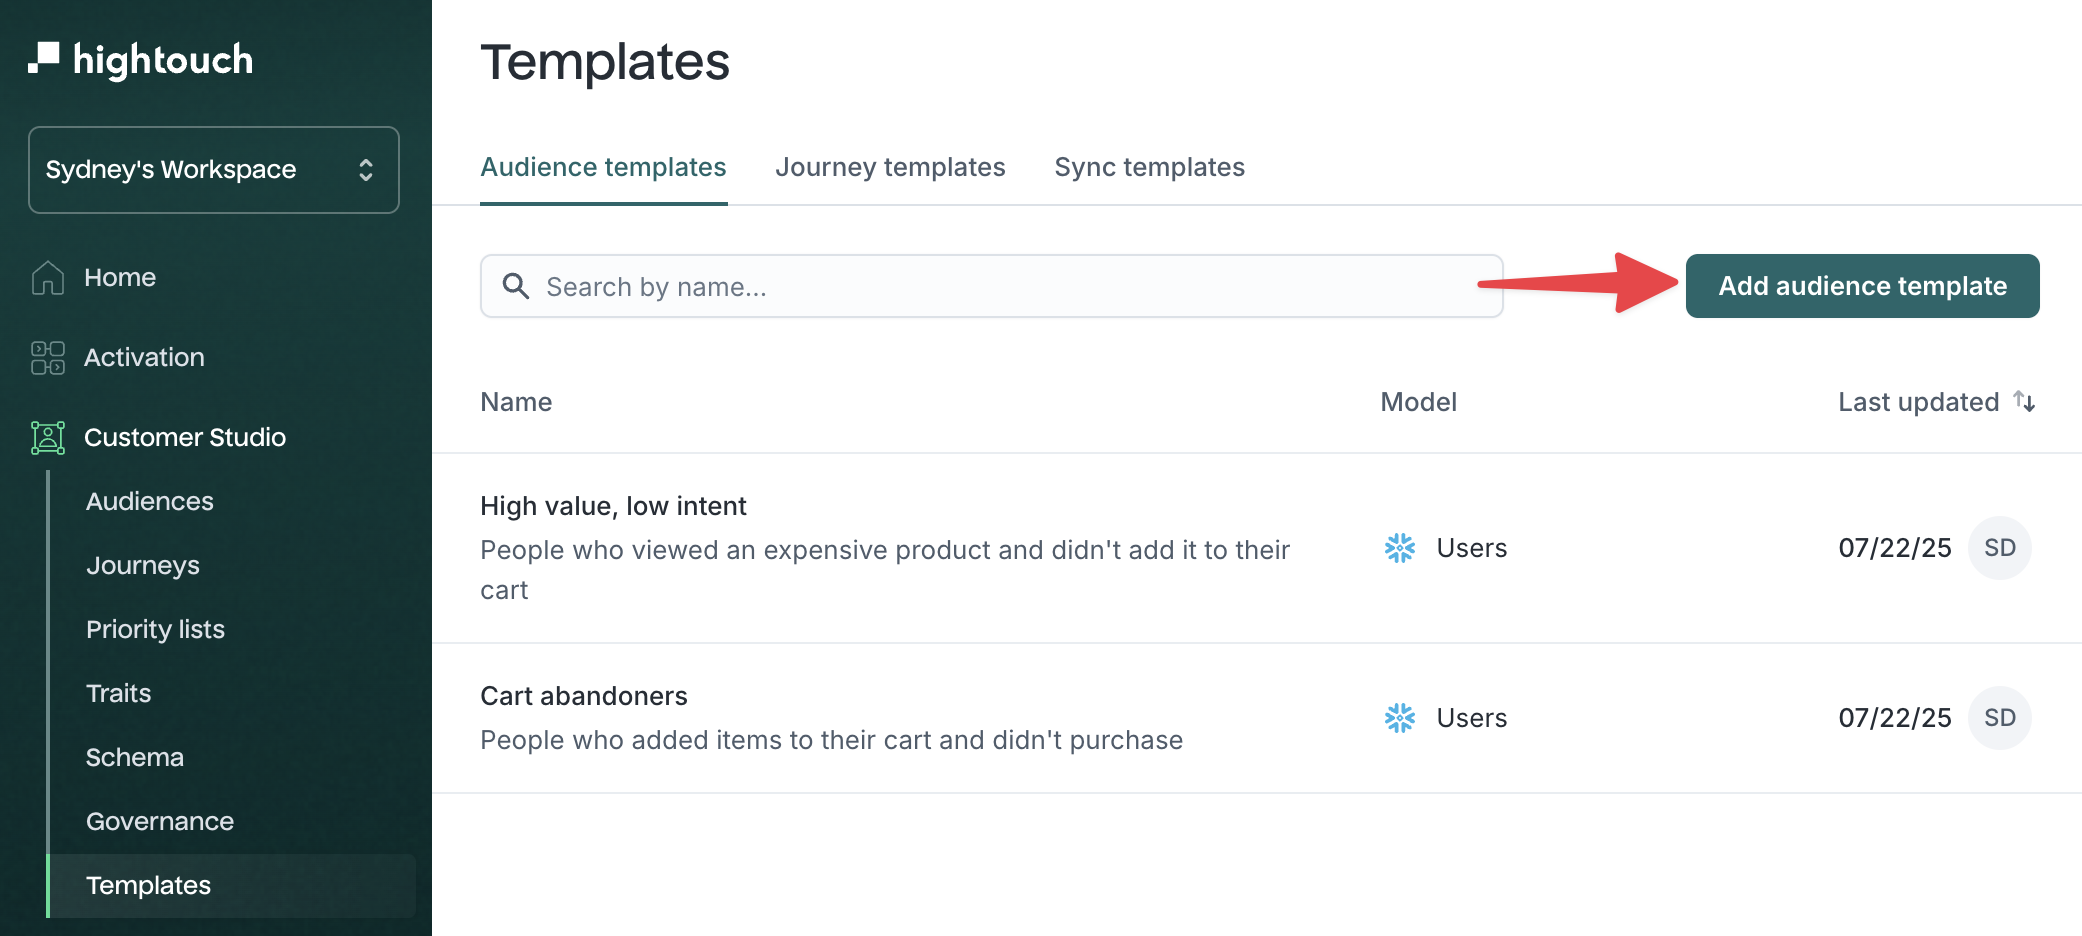
Go to Customer Studio → Templates → Audience templates
-
Click Add audience template
-
Select a parent model
-
Define filters, traits, or events like you would when building a normal audience
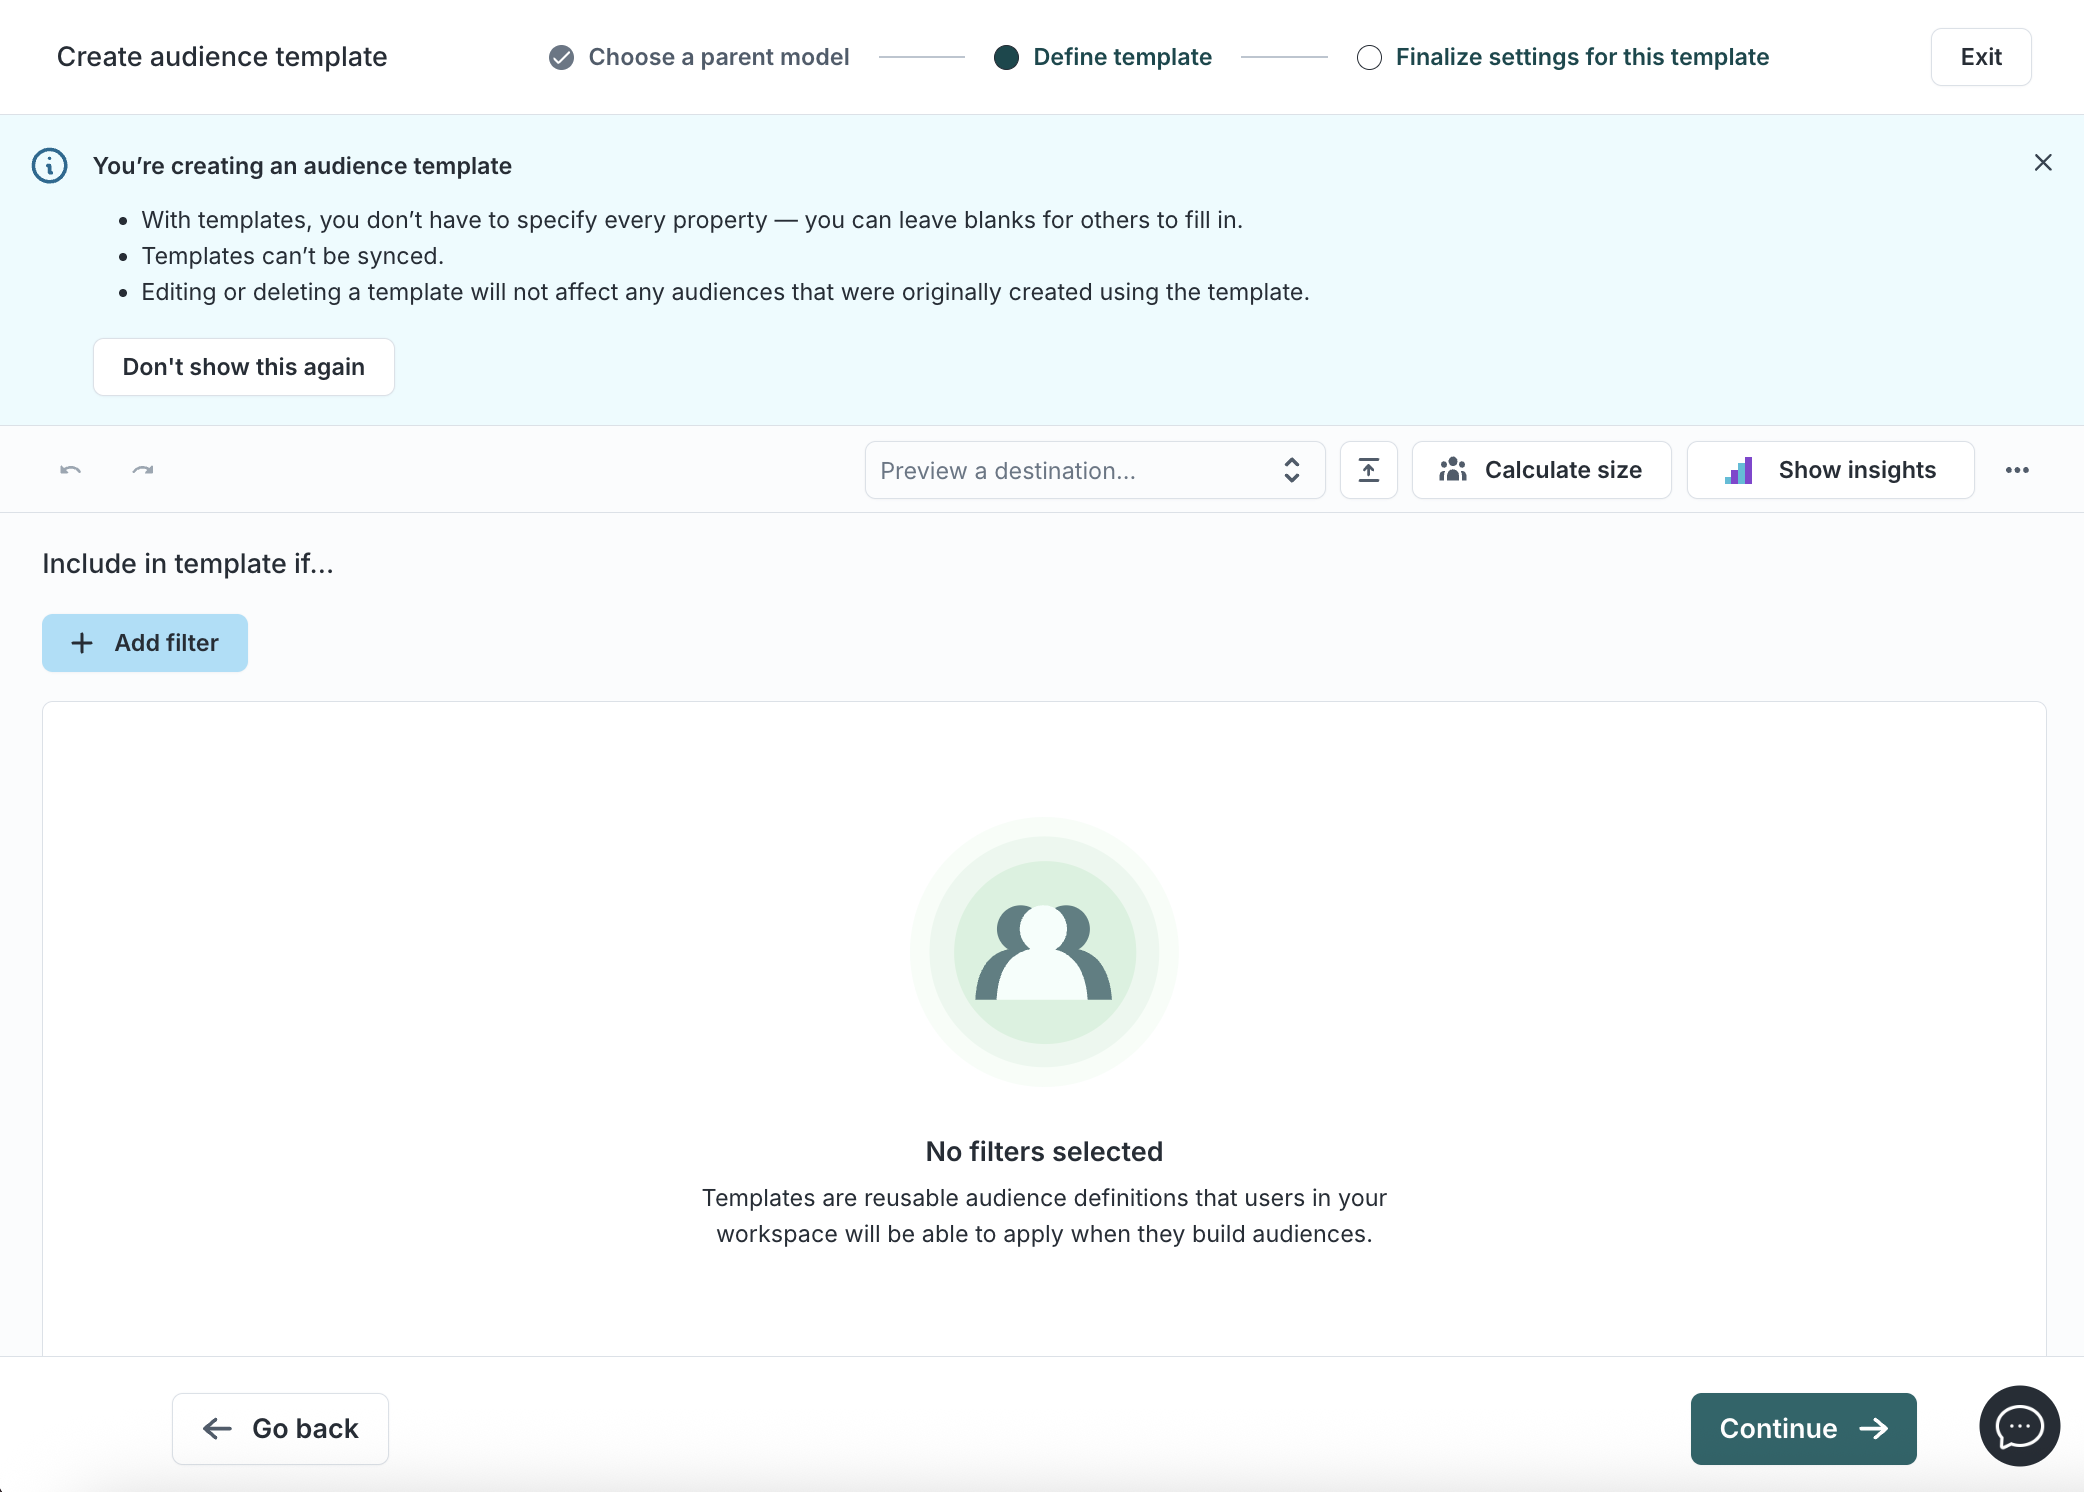
- Leave blank fields where customization is expected—users will be prompted to fill these when applying the template
-
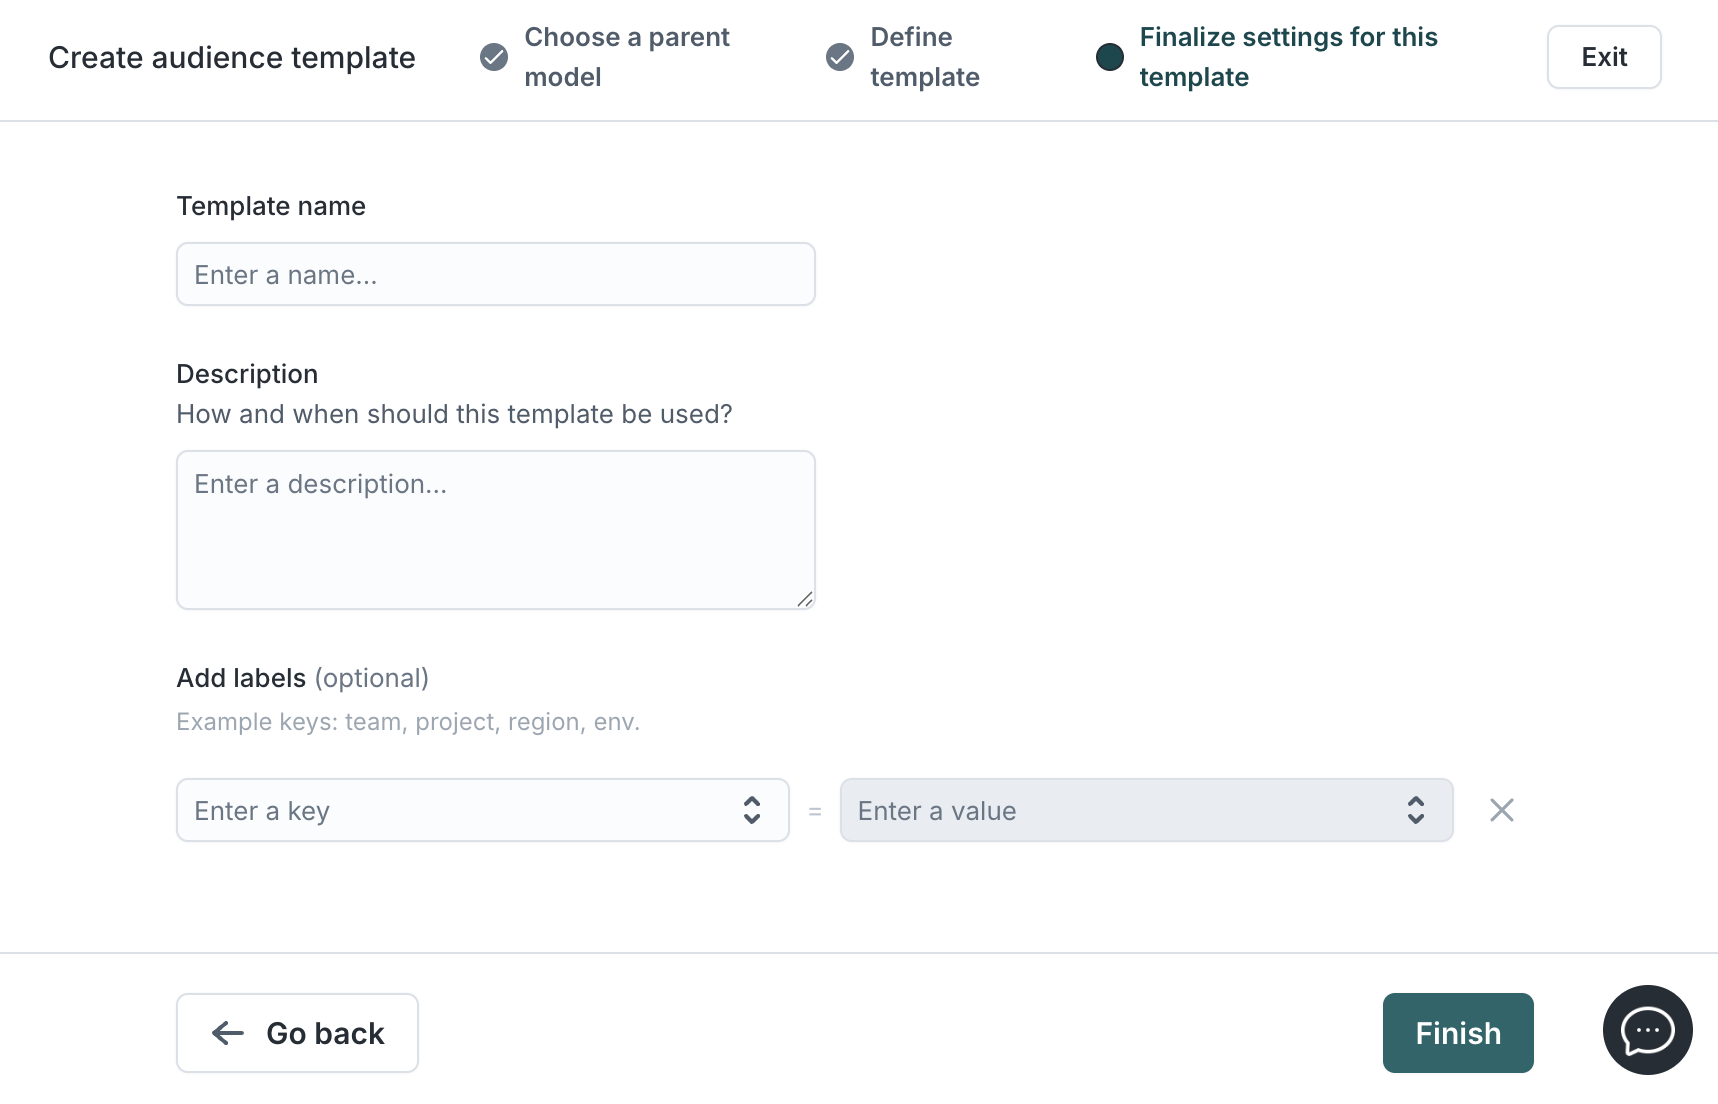
Name the template and optionally add a description
-
Click Finish
Apply an audience template
To use an audience template:
-
Go to Customer Studio → Audiences
-
Click Add Audience and select a parent model
-
Open the 3-dot menu and click Add a template (or select a template beneath Start with an audience template)

-
Select a template with a matching parent model
-
Fill in any required blanks (highlighted in blue)
-
Save and finish editing as needed
Sync templates
When managing many audiences, it can become tedious to recreate the same sync configuration each time. For example, you may want to sync several Lookalike audiences to Meta. Hightouch offers a tool called sync templates to streamline your audience sync setup.
Sync templates let you define sync configuration settings once for a particular destination. You create the sync template and then use it to add syncs for each audience requiring the same configuration settings and schedule. You can also use multiple templates for an audience if you're sending it to several destinations.
Create a sync template
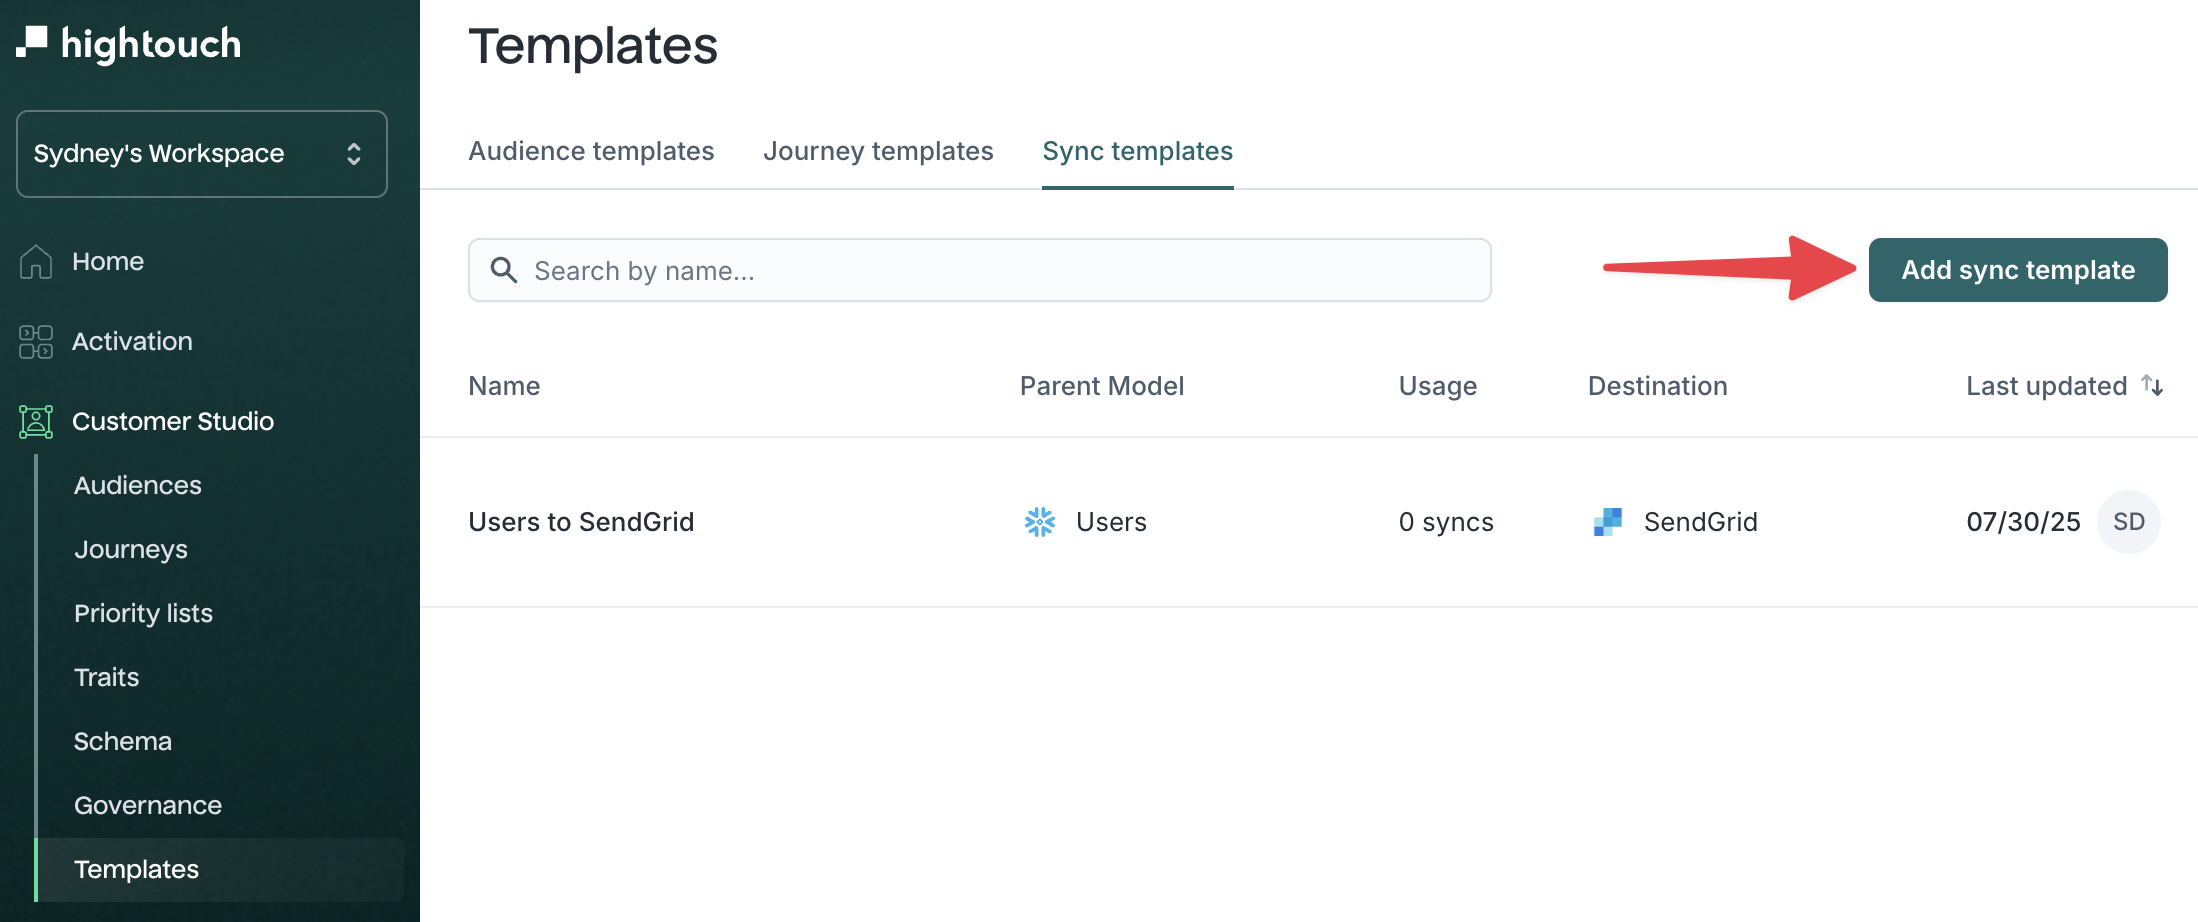
- Go to Customer Studio → Templates → Sync templates
- Click Add sync template
- Choose a parent model
- Select a destination and configure the sync settings. Follow individual destination configuration instructions →
- Click Save
You can now use the sync template for multiple audience syncs.
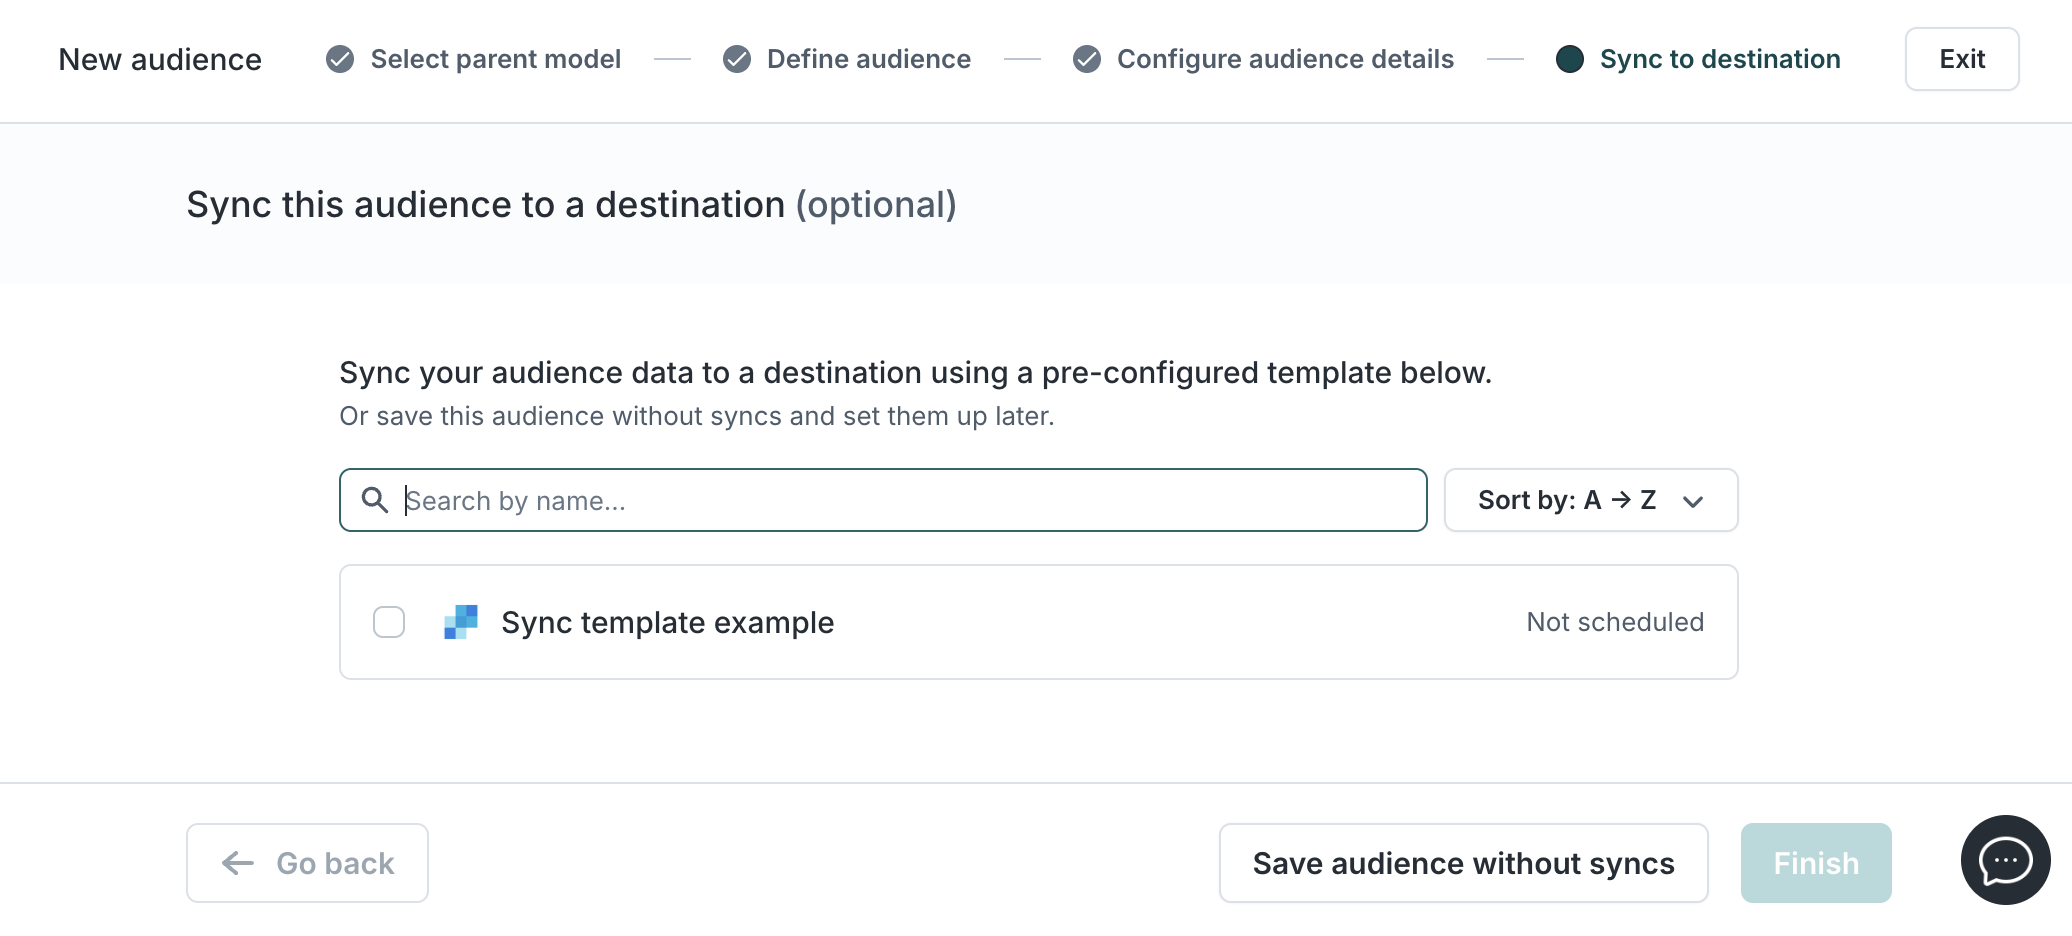
Apply a sync template during audience creation
- Build a new audience and proceed through:
- Select parent model
- Define audience
- Configure audience details
- On the Sync to destination (optional) step, select one or more matching sync templates
- Click Finish, or Save audience without syncs to skip for now
Apply a sync template to an existing audience
Audiences can only use sync templates derived from the same parent model as the audience.
- Go to Customer Studio → Audiences
- Select an audience
- Click Add and choose Sync from the dropdown
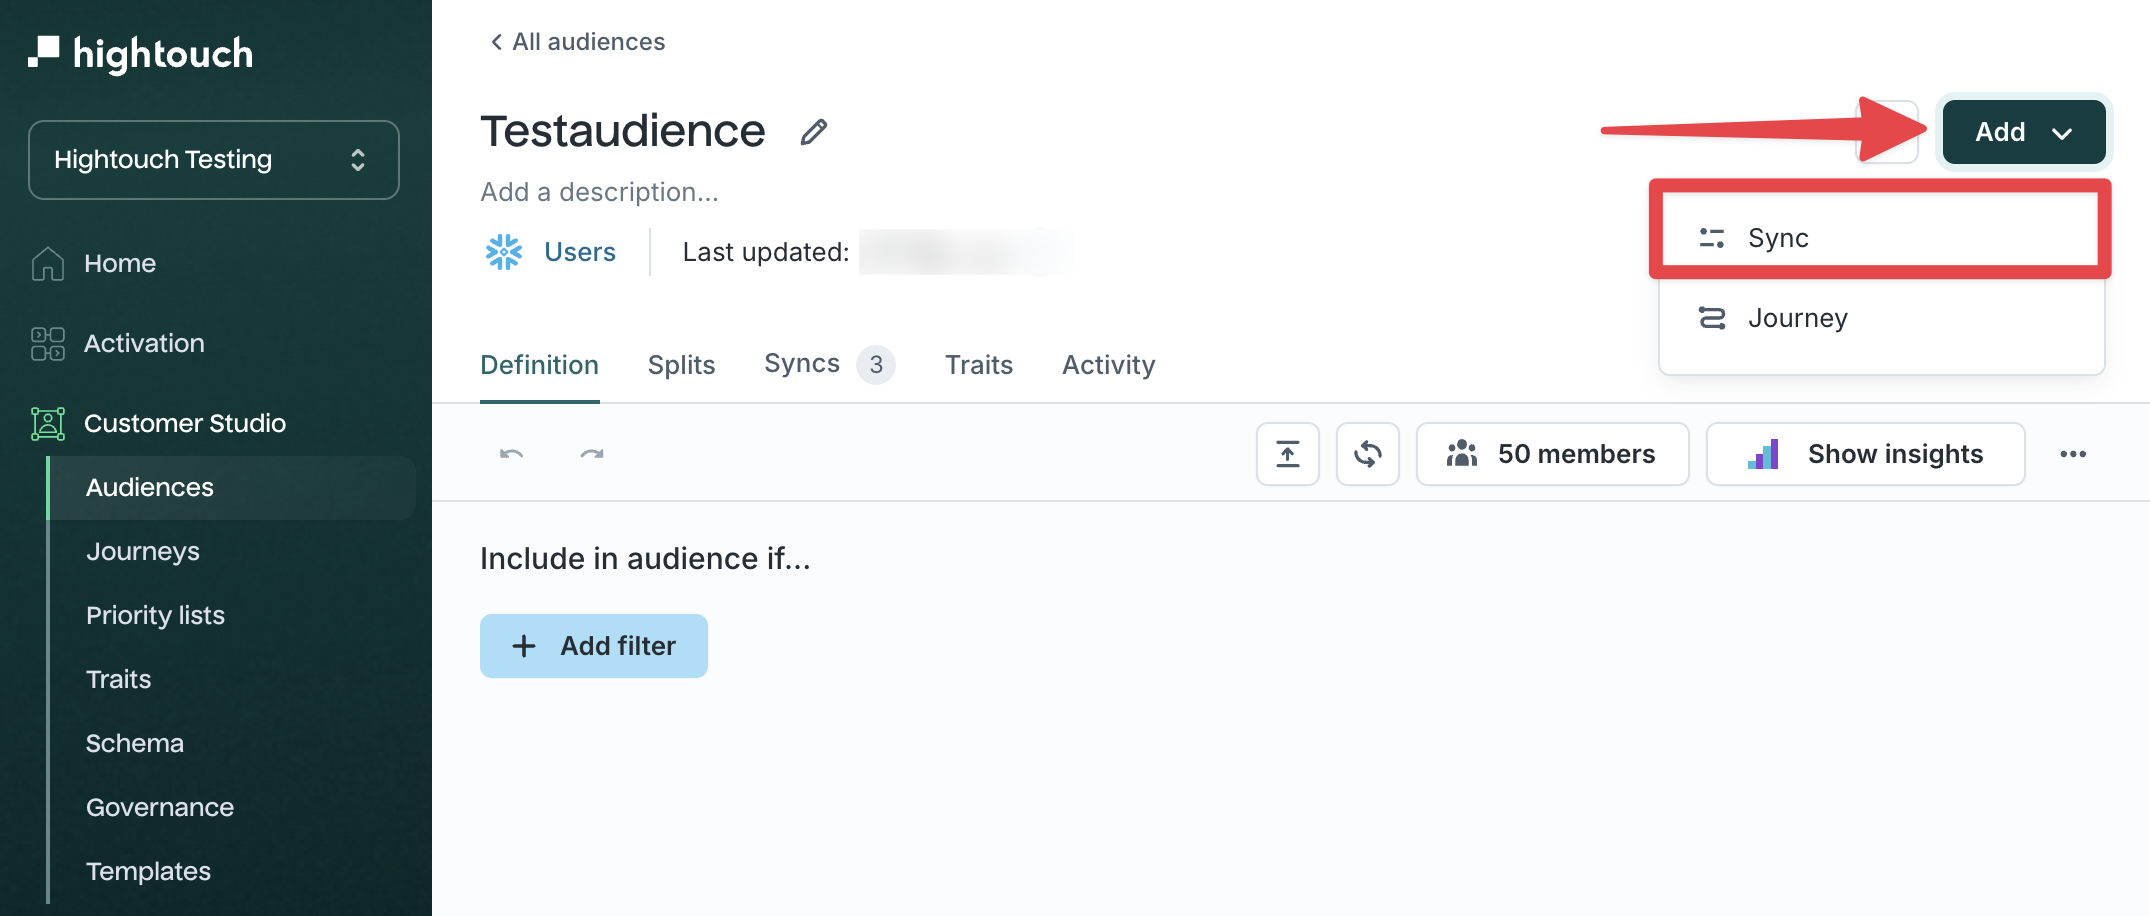
- In the modal, select one or more Sync templates
- Click Add syncs
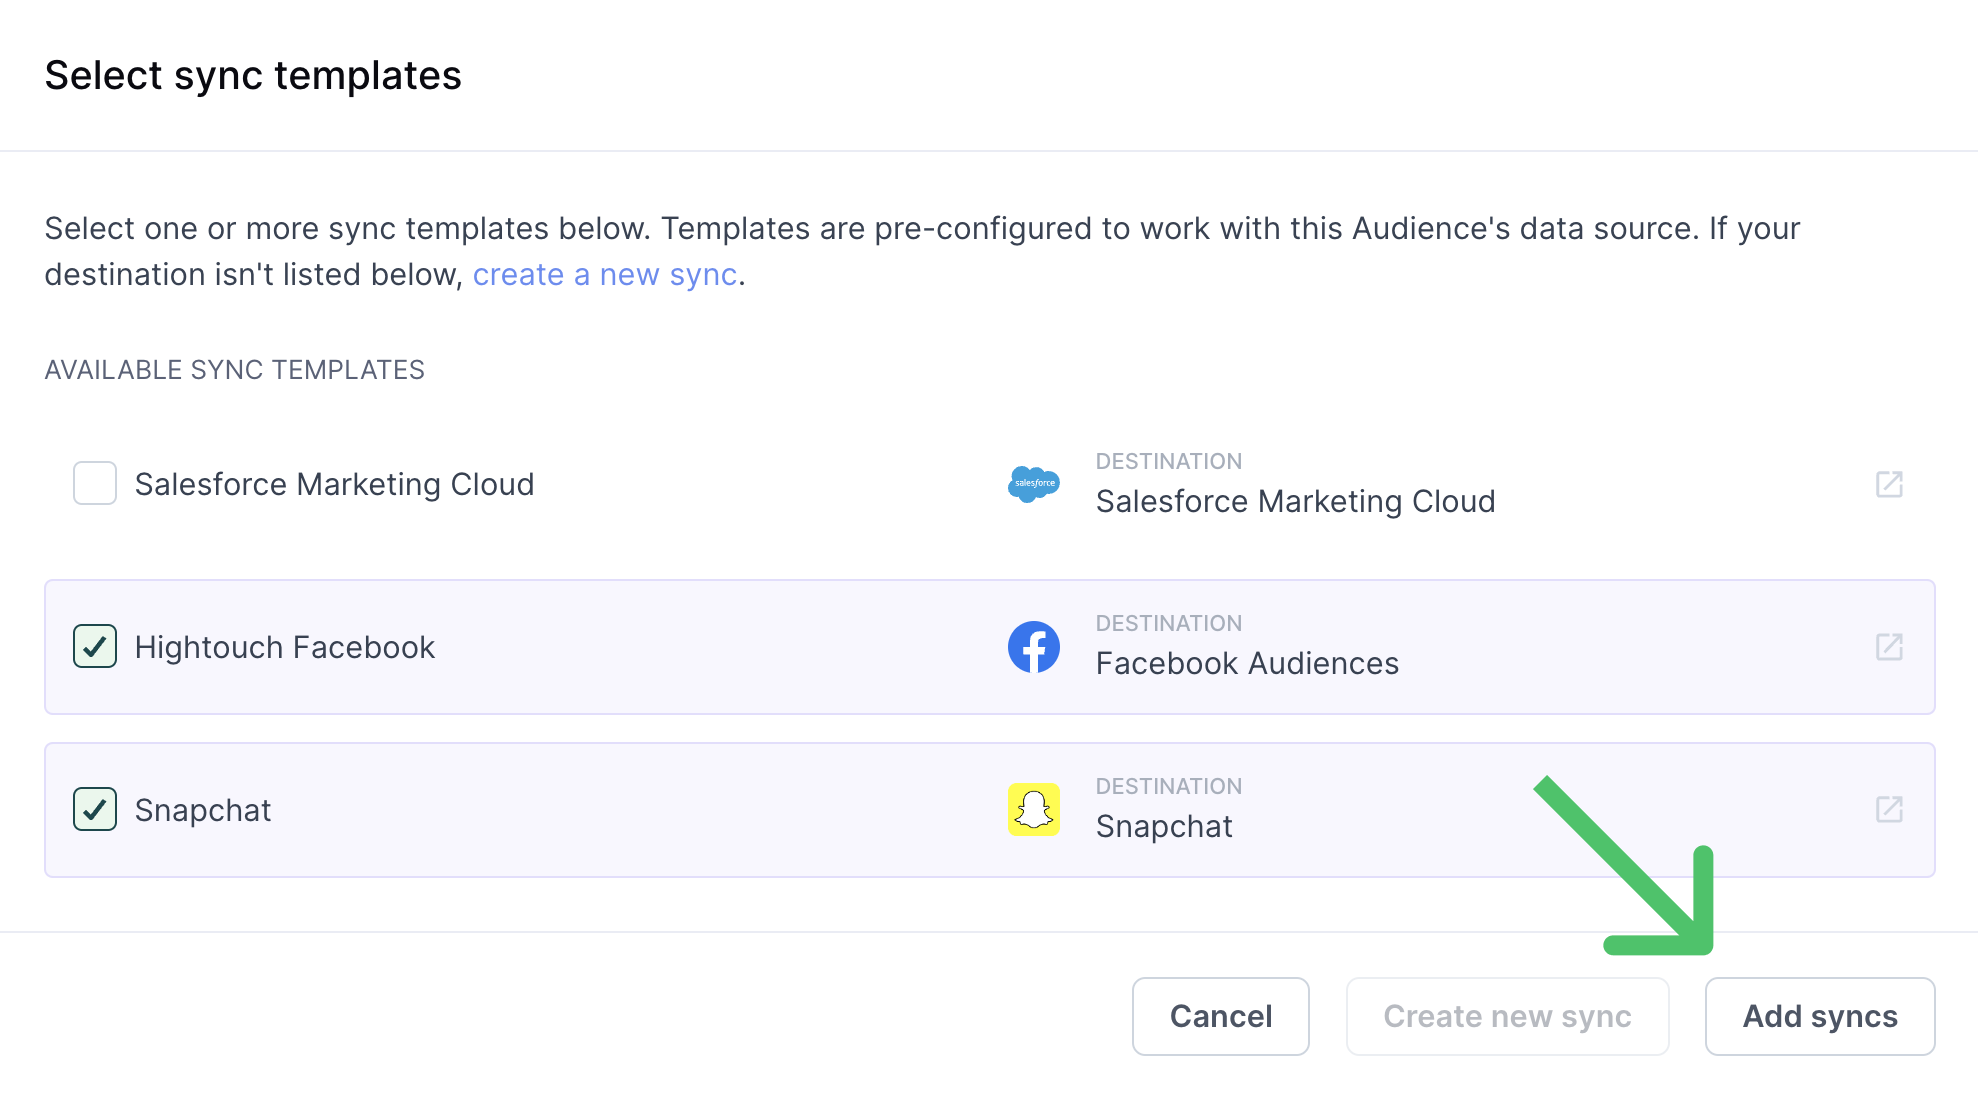
The sync inherits configuration and scheduling from the template. If the template changes, those changes propagate to all derived syncs.
Apply a sync template in journeys
- Build your journey and add a Send to destination tile to your canvas.
- When configuring your sync, select a template from the dropdown
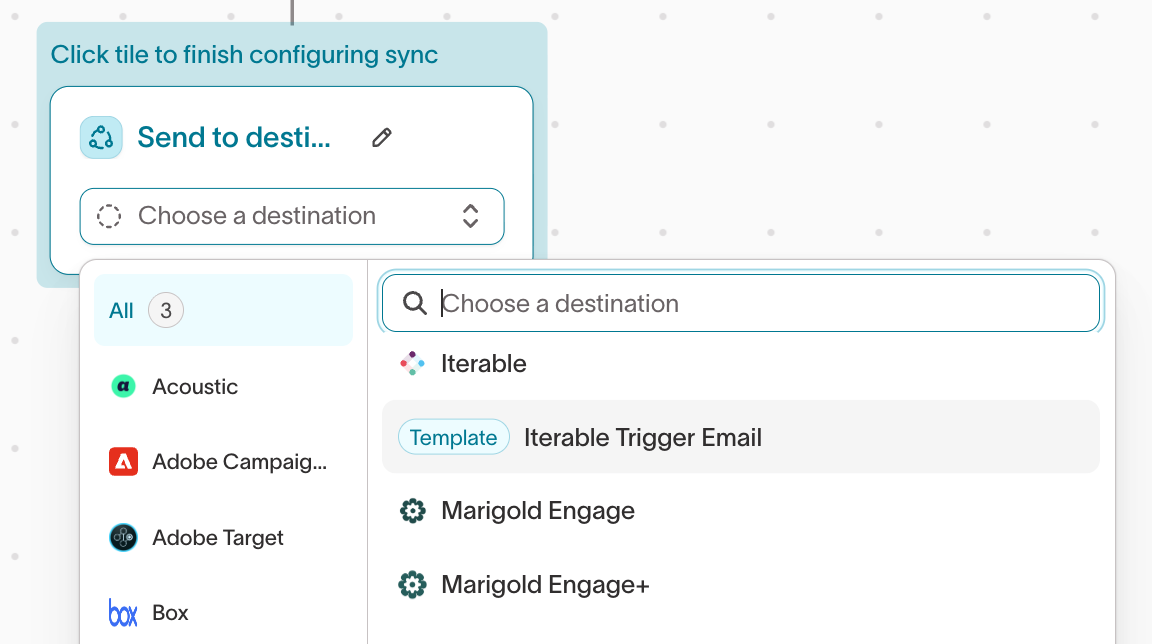
- Fill in any of the fields that were left blank in the template, or make edits to fields that are unlocked.
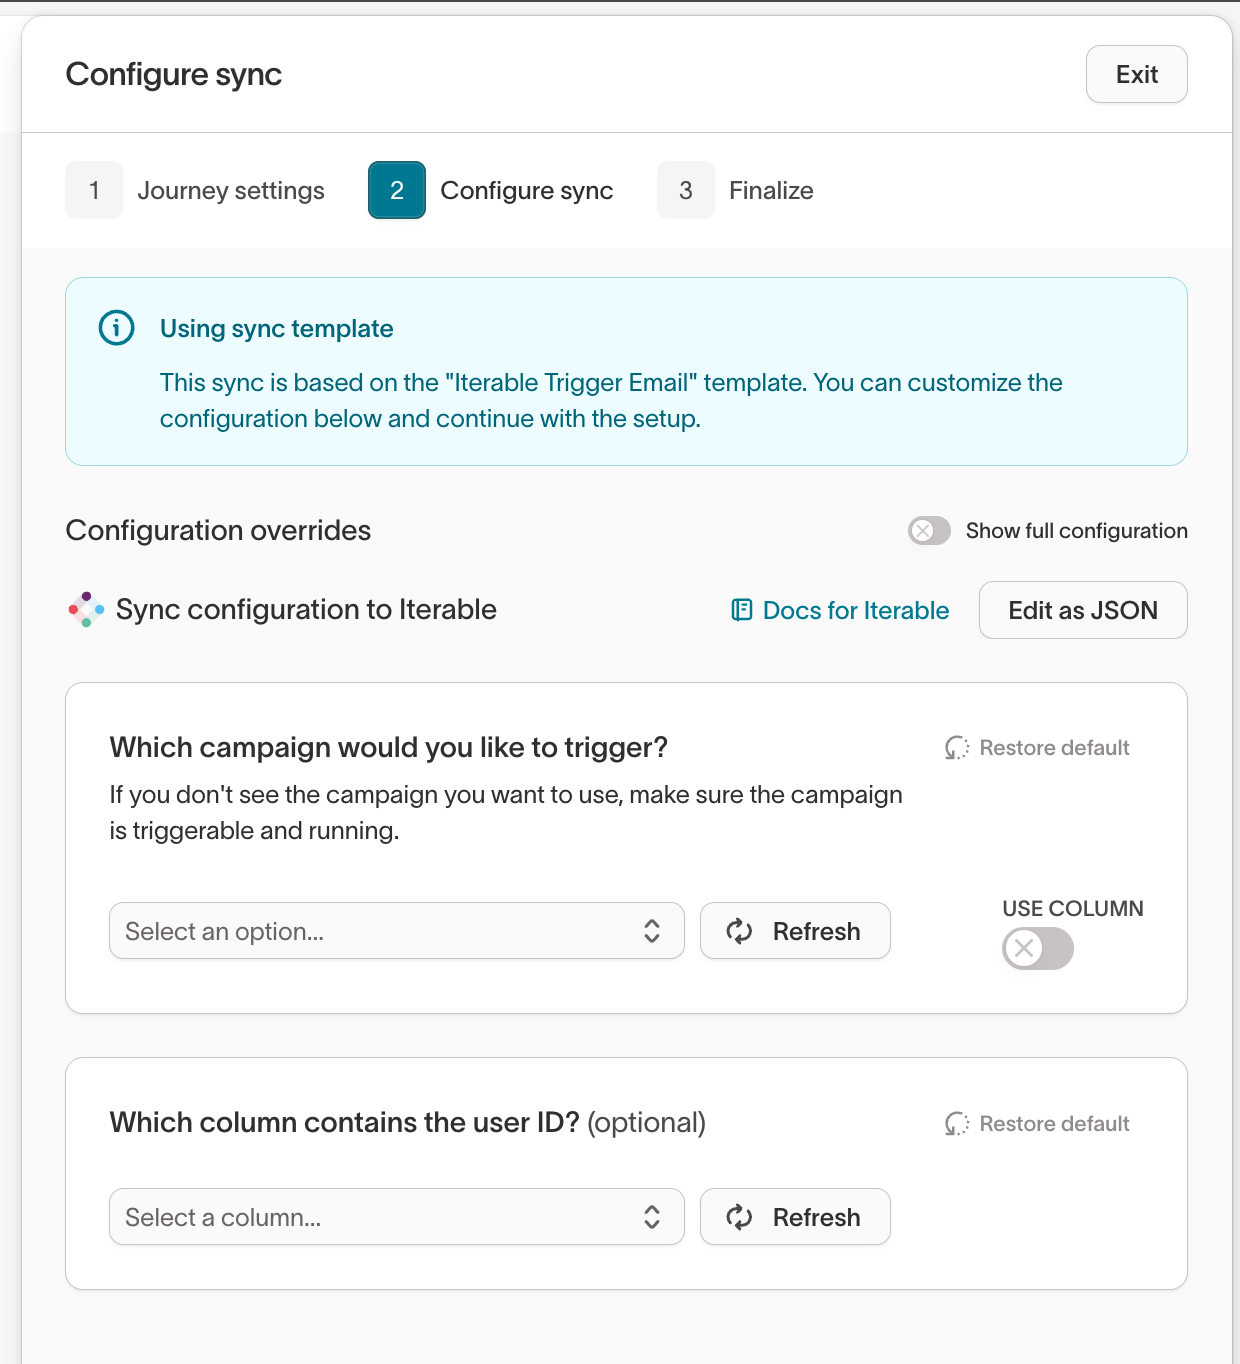
- Save your sync and journey.
This sync inherits configuration from the template. If the template changes, those changes will propogate to the journey syncs.
Unlock sync template fields
You can configure templates to leave certain fields “unlocked,” allowing users to customize them per sync.
Supported destinations include:
- Braze
- Braze Cohorts
- Display & Video 360
- Meta Custom Audiences
- Google Ads
- Google Ad Manager 360
- Google Sheets
- Iterable
- Marigold Engage
- Marigold Engage Plus
- Pinterest Ads
- S3
- Salesforce Marketing Cloud
- Snapchat
- TikTok
- Upland Waterfall
- Yahoo
To unlock a field:
- Open the sync template configuration
- Toggle Lock this field off
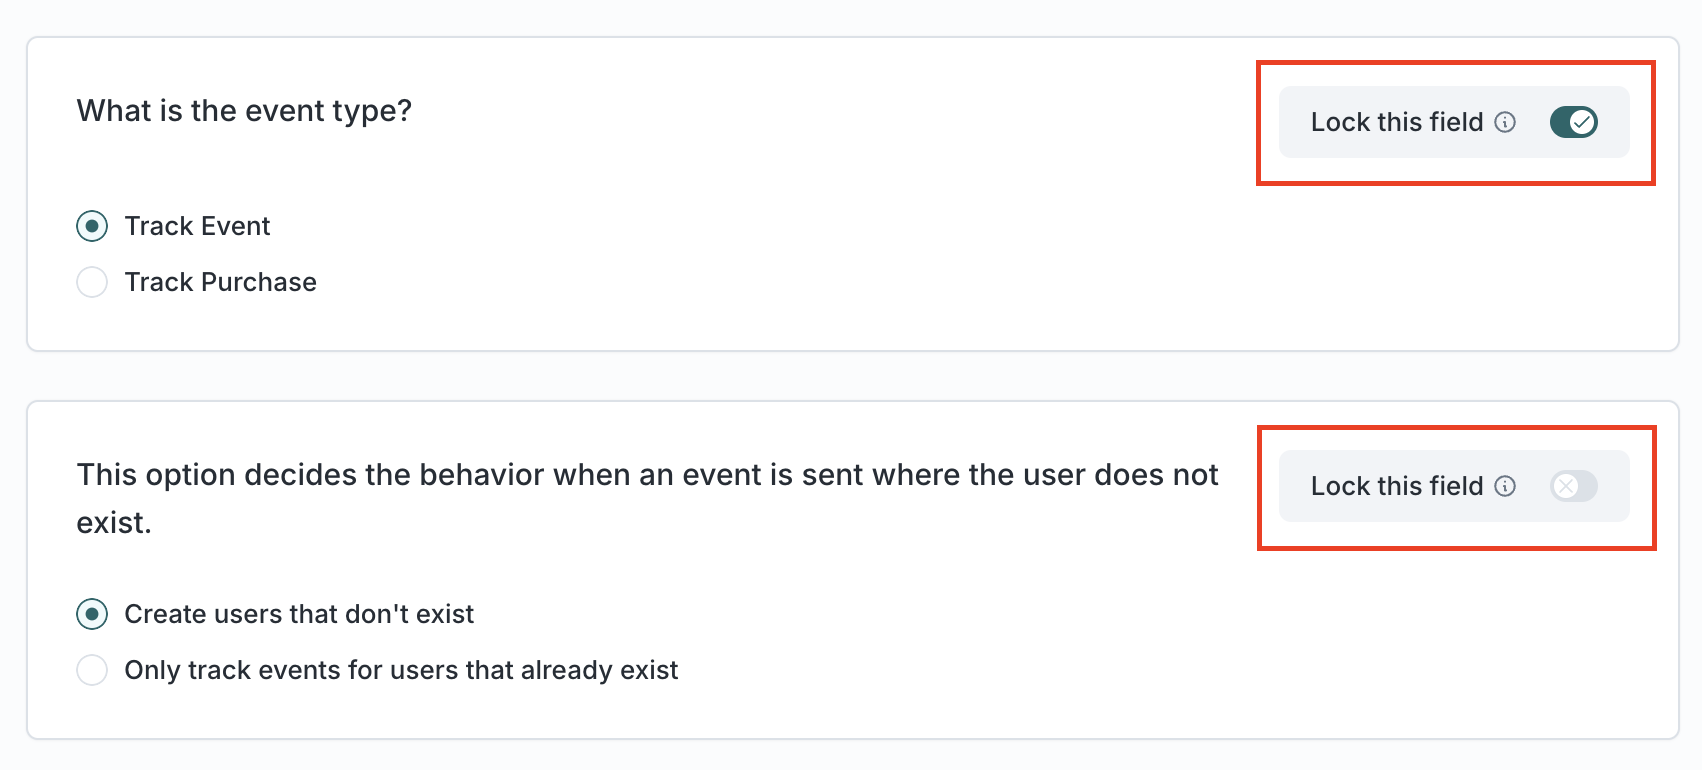
Some fields are dependent on others. Hover over the toggle to see dependencies.
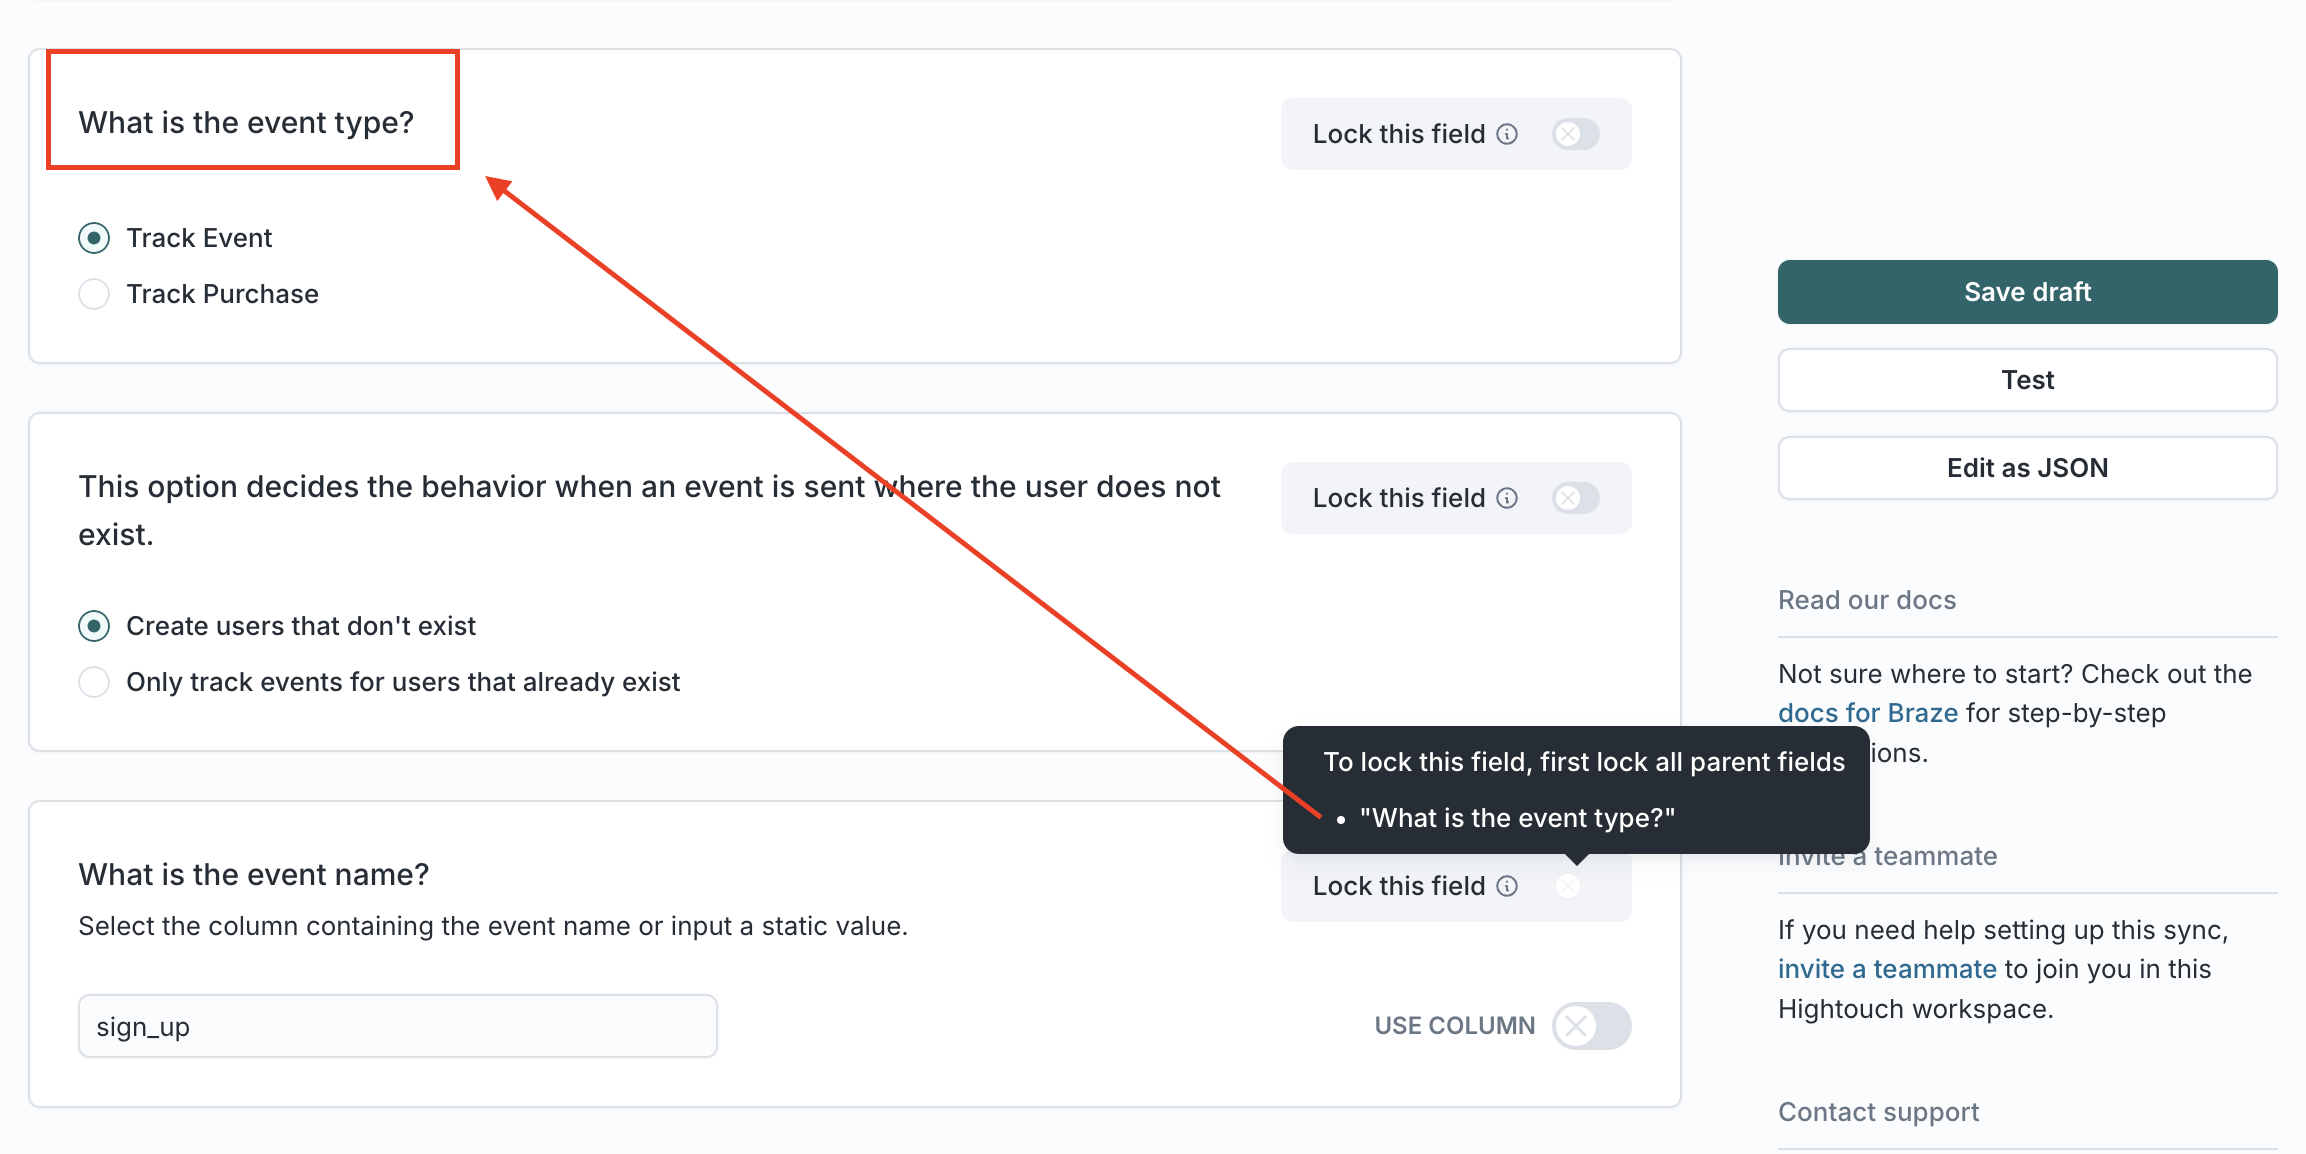
Once the template is attached to an audience, you can override unlocked fields.
You can update these overrides at any time from the sync configuration.
Journey templates
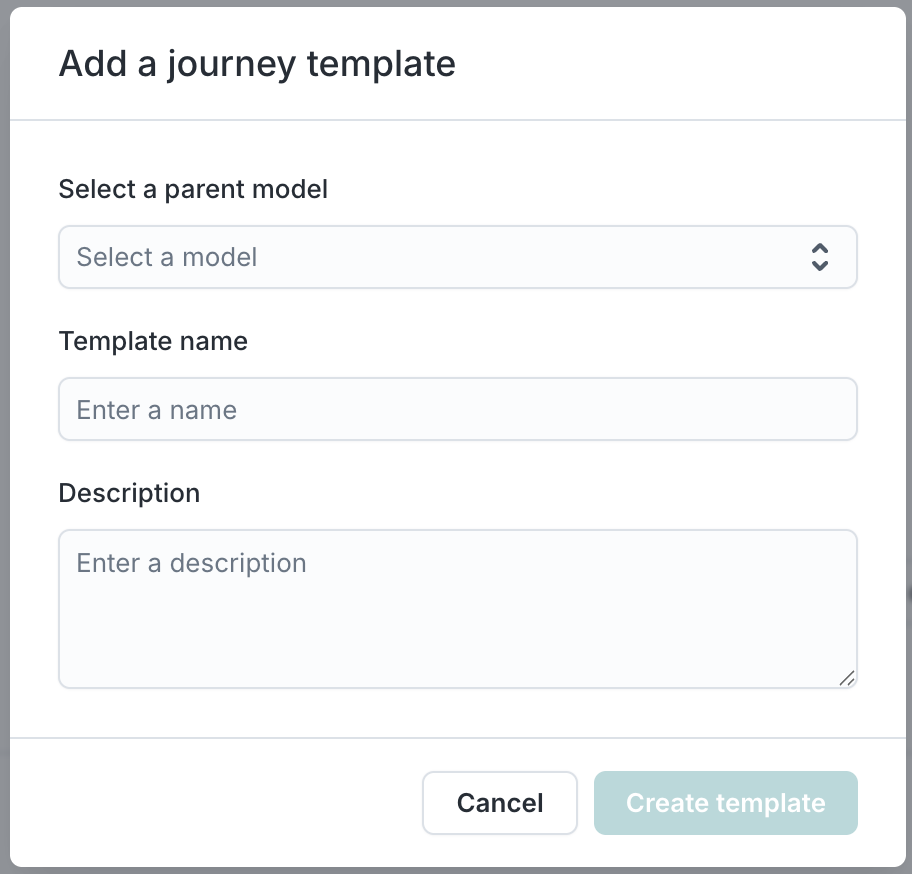
Create a journey template
- Go to Customer Studio → Templates → Journey templates
- Click Add a journey template
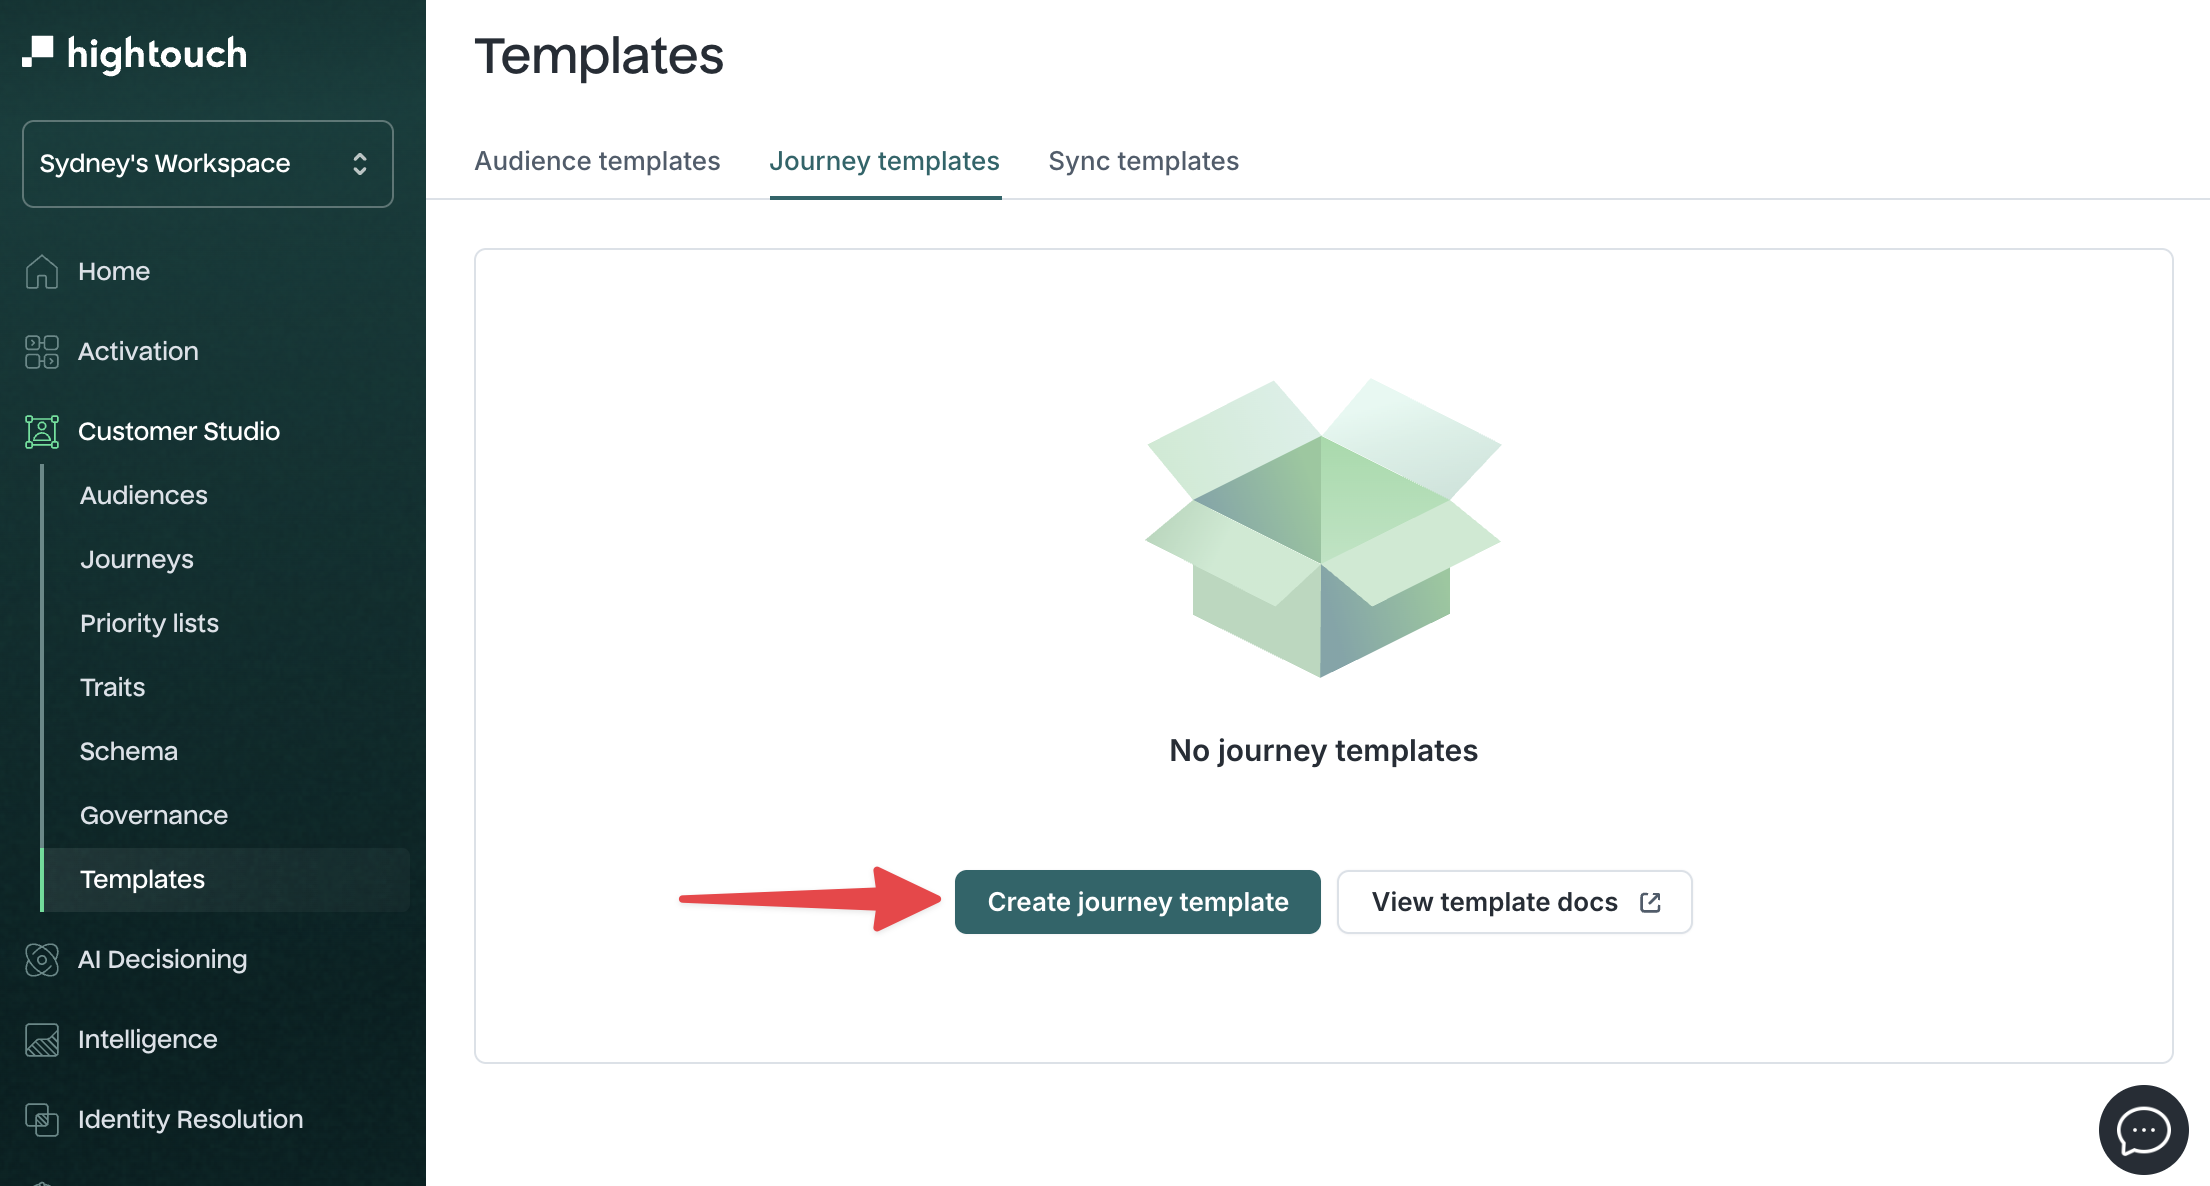
- Select a parent model
- Enter a template name and optionally add a description
- Click Create template
Use a journey template
- Go to Customer Studio → Audiences
- Select an audience
- Click Add and choose Journey from the dropdown
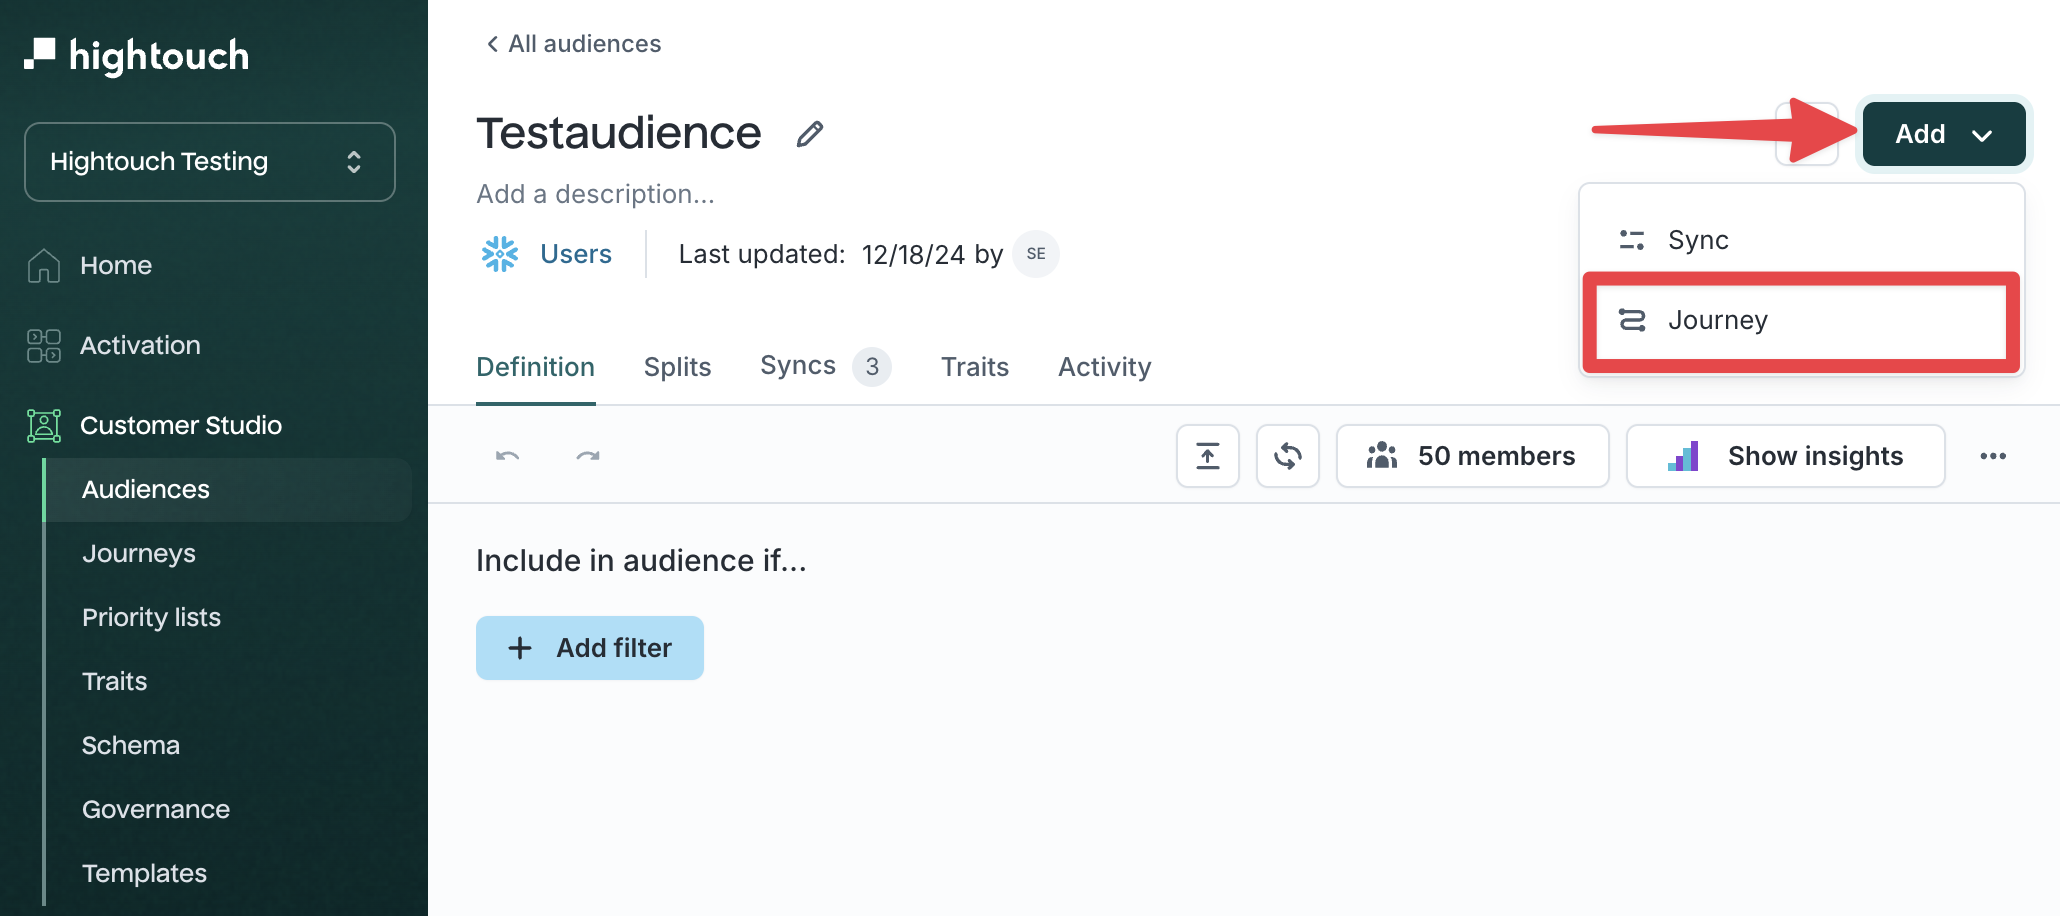
- In the modal, enter a name and optional description
- Click continue
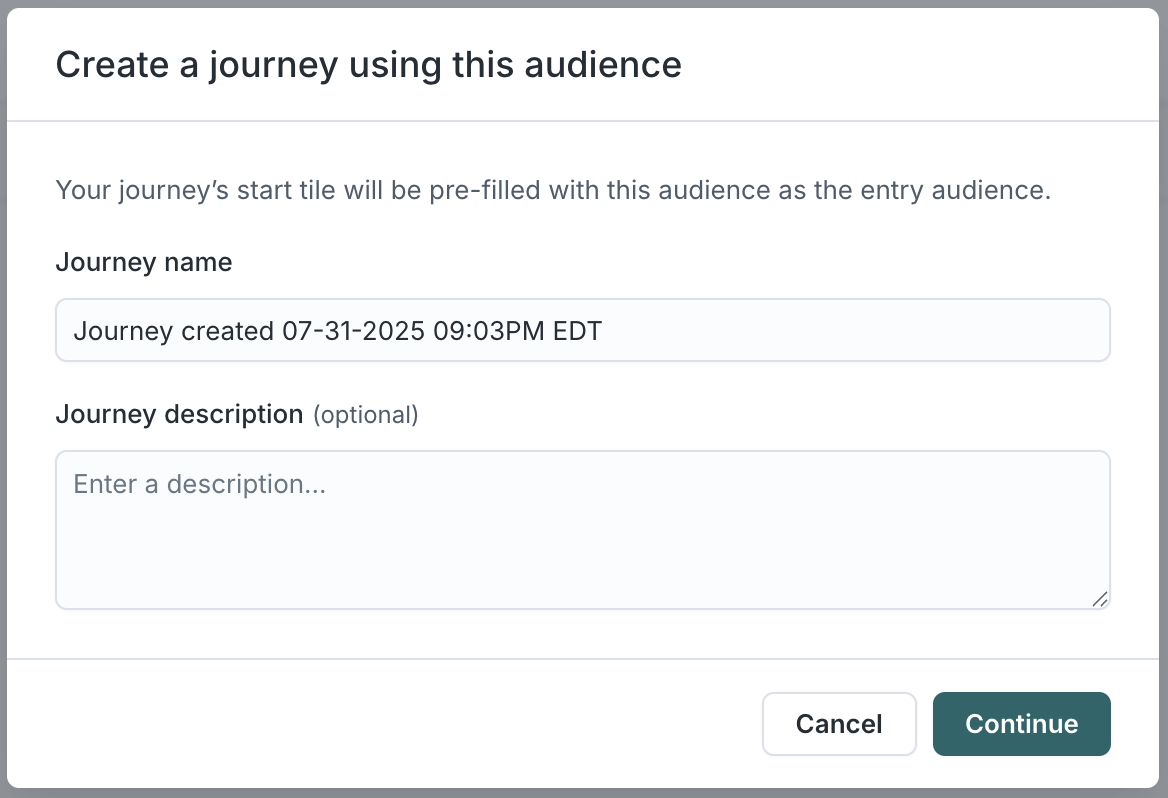
You’ll be taken to the journey builder with the selected template pre-applied.
Best practices
-
Use templates for commonly used audiences, especially suppression groups or VIP cohorts
-
Leave placeholders in audience templates where campaign owners should customize filters
-
Use sync templates to enforce consistent identifiers and opt-out handling across destinations
-
Name templates clearly by purpose (e.g., “Klaviyo cart abandon sync” or “Loyalty email segment”)